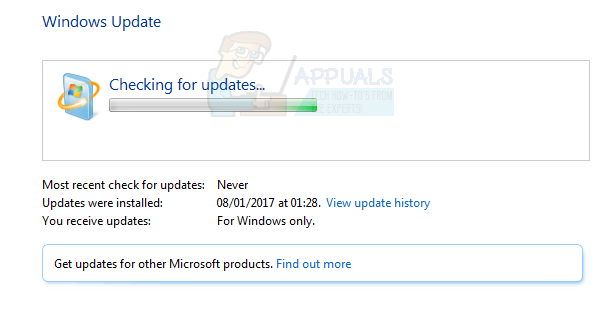
There are a wide range of things that can cause this to occur. It might happen because you aren’t allowed to download Windows Update or it might be because of Windows update settings not being configured correctly. Issues with administrative rights or an infection might also be the reason.
Method 1: Downloading Windows Updates
Go here and download the KB3020369 and install it. Do not worry about having this update already on your computer. If you have already installed it then you won’t be able to install it again. Download the KB3020369, somewhere where you can find it, for your Windows version and run the downloaded file. The installer will detect if you already have the update installed or not. Once it is installed or says you already have it, restart your computer. Now go here and download the KB3172605. Follow the same procedure for KB3172605 as you did above. Once it is installed, restart your PC. Do the following once the PC is restarted. Now wait for the system to check, download and install the updates.
Method 2: Windows Catalogue
For this method to work, you need to use Internet Explorer. This method will NOT work if done from any browser other than Internet Explorer. You will use Internet Explorer to select the two updates that you need to solve the issue and download them. Now open Internet Explorer (Click Start then click Internet Explorer) and paste this link http://catalog.update.microsoft.com/home.aspx in the address bar (located on the top mid). If Internet Explorer is not your default browser then don’t just click and open the link because that won’t work. Copy and paste the link in the Internet Explorer. Once the download is finished, go to the Desktop (or where you downloaded the files) and double-click KB3020369 installer. The installer will check whether you have already installed the KB3020369 or not. Once it is done, restart the system. This is necessary for the update to take effect. Now go to the Desktop (or where you downloaded the files) and double-click the KB3172605 installer. Restart your computer once the installer is finished. Do the following once the PC is restarted. Wait for the updates to finish. This should solve the problem.
Reminder
Once you are done with the updates, you can revert back to the old settings in Control Panel. You can also keep the settings if you don’t want the system to automatically check for updates. If you are keeping the “Never check for updates (not recommended)” option then don’t forget to check for updates manually. You should check for updates at least once a month especially after the second Tuesday of every month since Microsoft tend to release updates at that time.
Method 3: Reset Update Components
In this method we will manually restart the BITS, Cryptographic, MSI Installer and the Windows Update Services and rename the SoftwareDistribution and Catroot2 folders which definitely solves the problem.
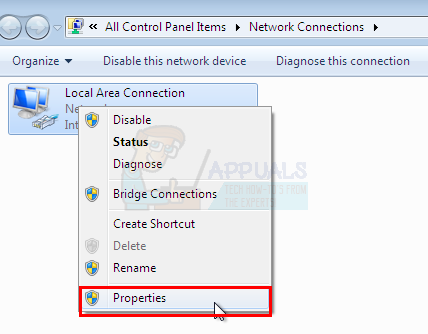
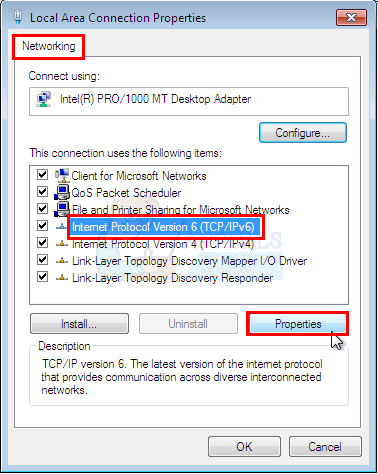
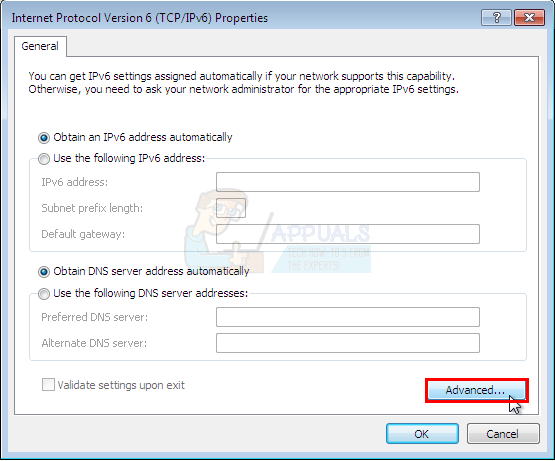
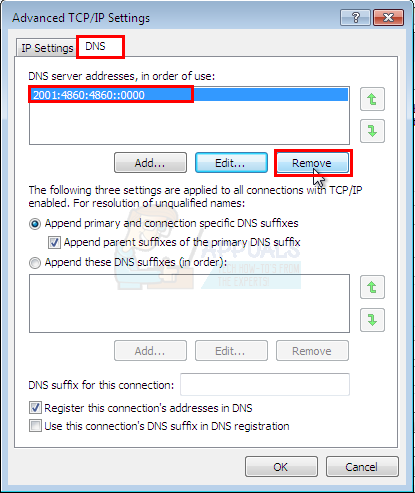
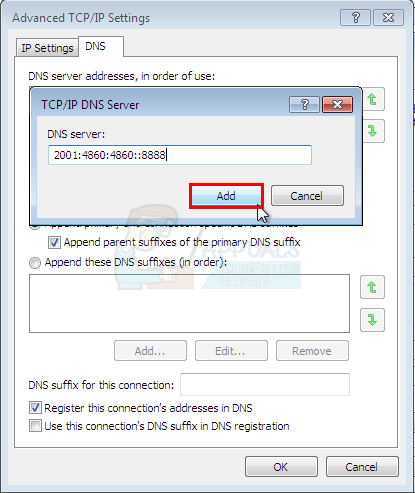
Method 4: Changing DNS server Settings
Changing the DNS server settings also solves the Windows Update problem. The steps for changing the DNS server settings are given below
Now check for Windows updates and see if the problem is solved or not. If your problem is still there or the problem is solved but you want to change the DNS settings back to what they were before, just follow the above given steps and enter the old DNS values on step 11/12.
Fix: Windows 10 setup stuck at checking for updatesFix: Stuck at “Checking Network Requirements"How to Fix ‘Error Checking for Updates’ Error on Google Play Store?Troubleshoot Stuck on ‘Checking Your Browser before Accessing’ Issue